Transflo Mobile
Manage your whole workday – anywhere, anytime! E-Logs, loads, documents, & more.
This helpful training guide details how to install your camera in your truck and more.
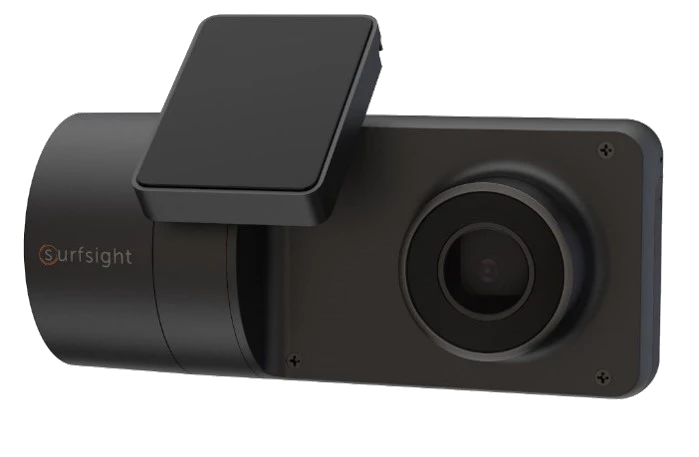
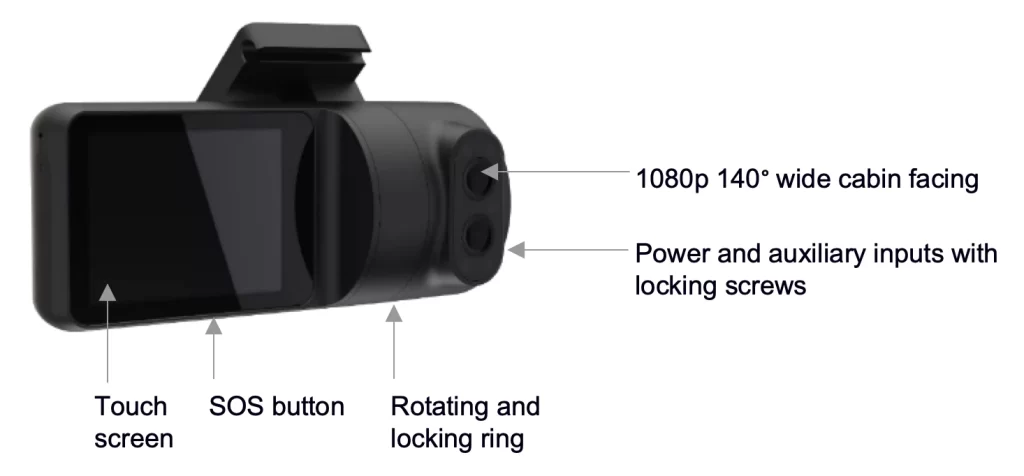
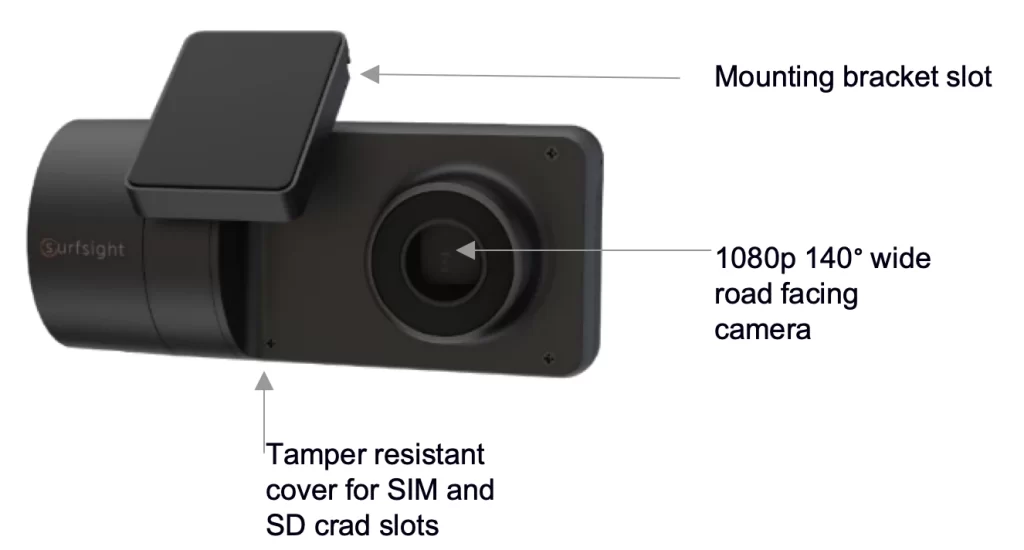
| This section describes what has been shipped to you and an overview of the Surfsight AI-12 Dashcam. | ||
 |
 |
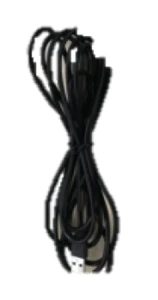 |
| AI-12 Camera | Mounting Bracket | USB Cable |
 |
 |
|
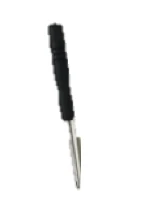
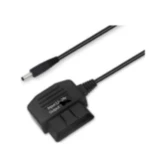
| Specialty Screwdriver | Optional: OBD Power Adaptor | Optional: Hardwire Kit |
 |
 |
|
| Cab Facing | Road Facing | |
WARNING: This type of installation should be performed by a qualified individual or professional only. Working with your vehicle’s power system can be dangerous to both you and your vehicle if you do not know what you are doing! If you have any doubts, please consult a professional.
For up to date support articles and installation guides please visit our support web pages at surfsight.net under Docs.
Install SIM and SD cards, mount, power and aim camera.
If camera comes pre-installed with SD and SIM cards skip to Step 2. In case the camera is not pre-installed with an SD and SIM cards, please follow the following steps to insert the SD and SIM cards.
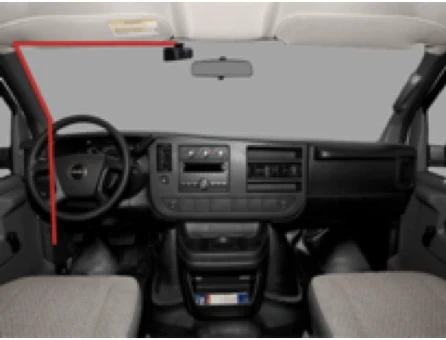
WARNING: Do not install the product in a location where it can obstruct the drivers field of vision.
The camera should be placed as high as possible on the driver side of the vehicle. Make sure the glass is clean and dry before attaching the 3M adhesive mount to the windshield.
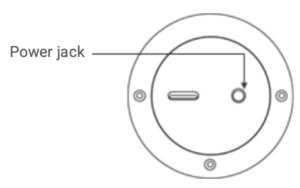
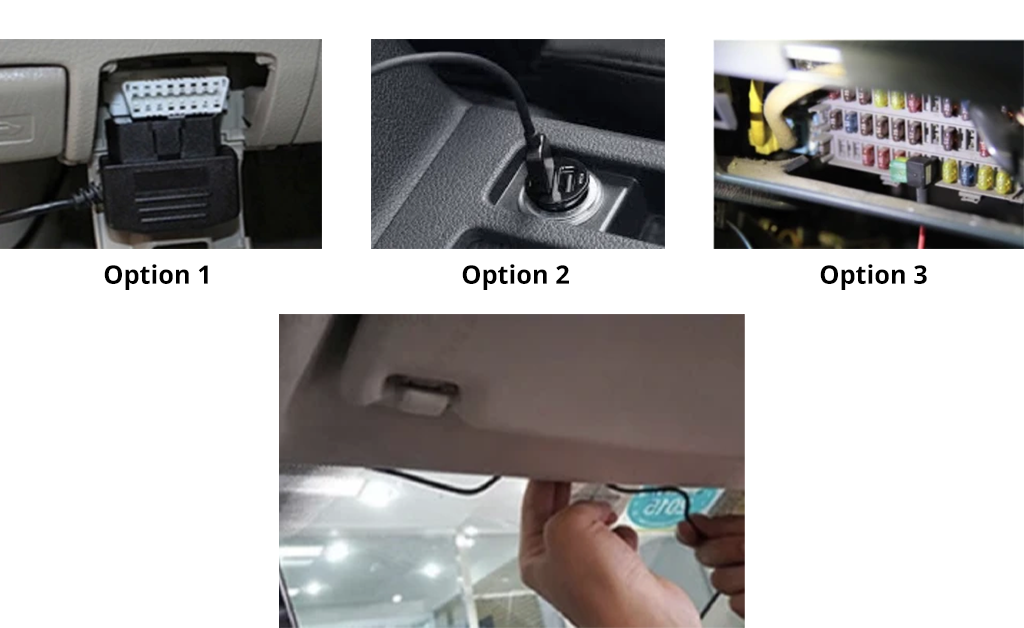
The dash cam has 3 options to connect a power source (listed below) using the supplied USB cable, OBD cable or hardwire kit. The power cable connects to the round connector located on the side of the camera.
Option 1: OBD Cable
Connect to the OBD port in your vehicle
Option 2: USB Cable
The power source should be able to supply 5V 2A.
Option 3: Hardwire Kit
Open the vehicle fuse box and connect as follows:
After Power is connected, run the power cable along the headliner of the car along the A-Pillar to the power source.
Follow the following steps to direct the road and cabin facing cameras.
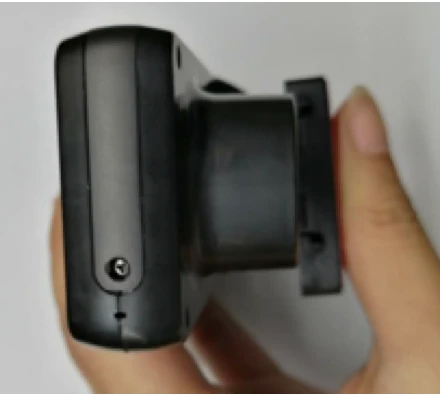
Dismount the AI-12 camera from the mounting bracket on the windshield. Make sure that the mounting bracket is not attached, as it locks the camera into position.
Use the screwdriver to loosen the three security screws on the round side of the camera. Do not remove the screws fully.
Adjust the viewing angle by rotating the body of the AI-12 and lock the three side screws when finished.
Mount the camera back onto the windshield.
Connect the camera to a power source.
The camera will turn on automatically.
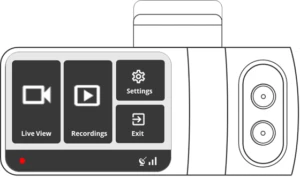
To unlock the camera touch screen enter a default PIN number 3333.
On the main screen enter the ‘Live View’ mode
Dismount the camera from the windshield and screw in the security screws all the way.
Mount the camera back on the windshield.
The dashcam contains an internal accelerometer that detects dangerous driving behavior to automatically create video events. The accelerometer is not calibrated in advance as the installation in every vehicle is different.
Please follow the following steps to calibrate the accelerometer:
Click on the link to set up your Geotab cloud-based Admin Portal.
Manage your whole workday – anywhere, anytime! E-Logs, loads, documents, & more.
Transflo Completes Electronic Logging Device Registration with FMCSA